
 Despite how good microscope you have, stand is still very important part of final assembly. And while there are many commercial ones made of cast iron, they might cost more than a microscope head itself. I decided to make stand from wildly available material laying around – it’s MDF (Medium Density Fiberboard). Advantages – stable over time if not exposed to water, dirt cheap, easy to process.
Overview
In general it can be made of any material you have by hand. Here are key requirements I tried to consider:
- Heavy. MDF used in this stand should weigh ~2.5 kilograms.
- Sturdy enough – flexing should be minimized.
- Adjustable height maintaining coaxial movement. Used macro slider to adjust lens distance.
- Quick position adjustment.
- Non exotic parts and materials.
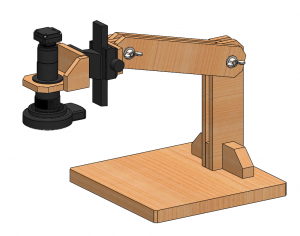
Quick weekend sketch and stand is ready to be made.
Construction
Parts
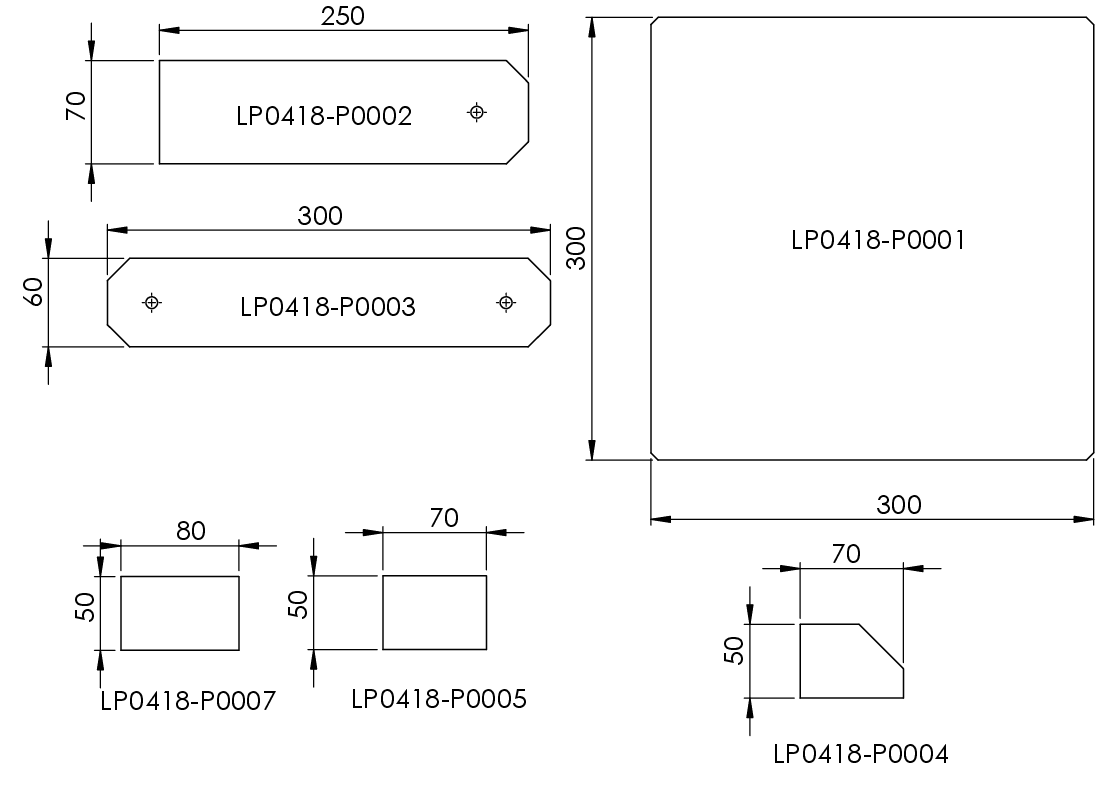
Parts to manufacture
Parts
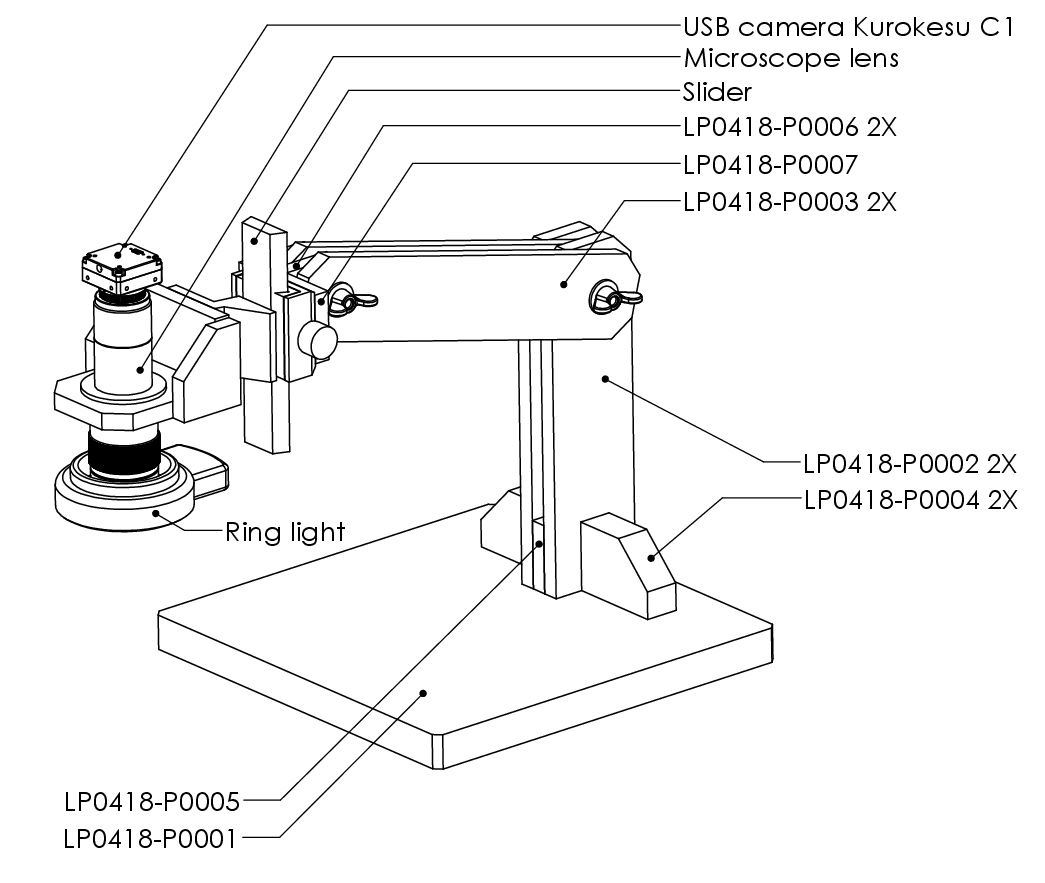
There are few kinds of parts used in this project:
- MDF parts – easy to cut and drill with any available tools
- Screws, nuts, wood glue – parts from regular hardware store
- Macro slider – key part which makes this contraption behave like real microscope. Can be obtained from eBay for under 10$.
- Last minute changes – I replaced some wooden parts with articulating magic arm clamp. Also obtained from eBay.
- Microscope lens and camera. You can use anything that suits your needs. I used parts from my shop (3D STEP models are available on Github):
- Ring light. Microscope can’t collect lot’s of light from a scene, so additional light is mandatory. I borrowed ring light from stereo microscope.
Making
Building whole stand took me 15minutes or so. Depending on tools you have and selected materials it might take longer. I also omitted painting.
- Prepare wooden parts – I used scrap material. Cutting with circular saw is quick and efficient task. Also helps maintaining perpendicular edges and cutting 45 miter angles. Highly recommended.
Tools for speeding the job. Cuts like a butter.
- Bolts I had were too long – had to trim few centimeters. Unnecessary task, but faster than going to local hardware shop. Had to improvise.

Trimming bolts
- Gluing is elementary job. Naturally – use wood glue and few clamps to secure whole contraption while it dries.
Results
After it dried, few additional holes were drilled and extra hardware were installed it become normal microscope. Was surprised how tough it felt! Of course when things are magnified a lot, even tiny vibration will be amplified and will be visible in your frame. Steady table is recommended.

Side profile of complete unit
PCBA inspection at minimal magnification
Zooming in…
Software recomendation
I tried many software packages to record video from USB camera and/or screen in the past. Some of them were better, some worse and some hopeless. But when I tested Open Broadcaster Software was surprised in a good way. It can record USB video, screen, mix views, has transitions between scenes and on top of that can stream directly to Youtube (or other service) live feed. It was definitely worth mentioning!
There are some minor issues (needs Administration permissions in order to record) and has dependencies on other libraries, but seems like all these “features” are discussed and well known. Once you get it running – there is no match. Best recording software ever!

Open Broadcaster Software (OBS) main window


